Our systems ship tarrif free

Building a Yeast Starter: Step-by-Step Guide
February 19, 2024 10 min read
Building a Yeast Starter: Step-by-Step Guide
Building a yeast starter is a crucial step in the brewing process that can greatly improve the quality of your beer. In this step-by-step guide, we will walk you through the process of building a yeast starter, from understanding the importance of a yeast starter to using it in brewing. Let's dive in and explore the world of yeast starters!
Understanding the Importance of a Yeast Starter
Before we delve into the process of building a yeast starter, it's important to understand why it is such a valuable tool for homebrewers. Yeast plays a vital role in the brewing process, and a healthy and active yeast population is essential for a successful fermentation. A yeast starter helps ensure that you have enough healthy yeast cells to properly ferment your beer and achieve the desired flavors and aromas.
The Role of Yeast in Brewing
Yeast is a microorganism that consumes sugars in wort (unfermented beer) and produces alcohol and carbon dioxide as byproducts. This process, known as fermentation, is the heart of brewing. Yeast not only converts sugars into alcohol but also contributes to the overall flavor profile of the beer. Different yeast strains can produce a wide range of flavors, from fruity and estery to spicy and phenolic.
Benefits of Using a Yeast Starter
Using a yeast starter offers several advantages for homebrewers. Firstly, it helps ensure a vigorous fermentation by providing a higher initial yeast cell count. This reduces the risk of off-flavors and incomplete fermentations. Secondly, a yeast starter allows you to propagate a specific yeast strain, enabling you to consistently reproduce your favorite beer recipes. Lastly, using a yeast starter enhances yeast health and vitality, resulting in a cleaner and more flavorful final product.
Now, let's dive deeper into the fascinating world of yeast and its impact on the brewing process. Yeast, a single-celled organism, belongs to the fungi kingdom. It has been used for thousands of years in various fermentation processes, including bread making, winemaking, and, of course, brewing. Without yeast, the art of brewing would not exist as we know it today.
During the fermentation process, yeast cells consume the sugars extracted from malted grains, such as barley, and convert them into alcohol and carbon dioxide. This transformation is what gives beer its unique characteristics and delightful effervescence. The yeast's ability to convert sugars into alcohol is a result of its metabolic activity, where it breaks down complex molecules and releases energy in the form of ethanol.
What makes yeast even more fascinating is its incredible diversity. There are hundreds of different yeast strains available to brewers, each with its own unique set of characteristics. Some strains are known for their ability to produce clean and crisp flavors, while others are prized for their fruity and estery profiles. The choice of yeast strain can greatly influence the final taste and aroma of the beer, allowing brewers to create a wide range of styles and flavors.
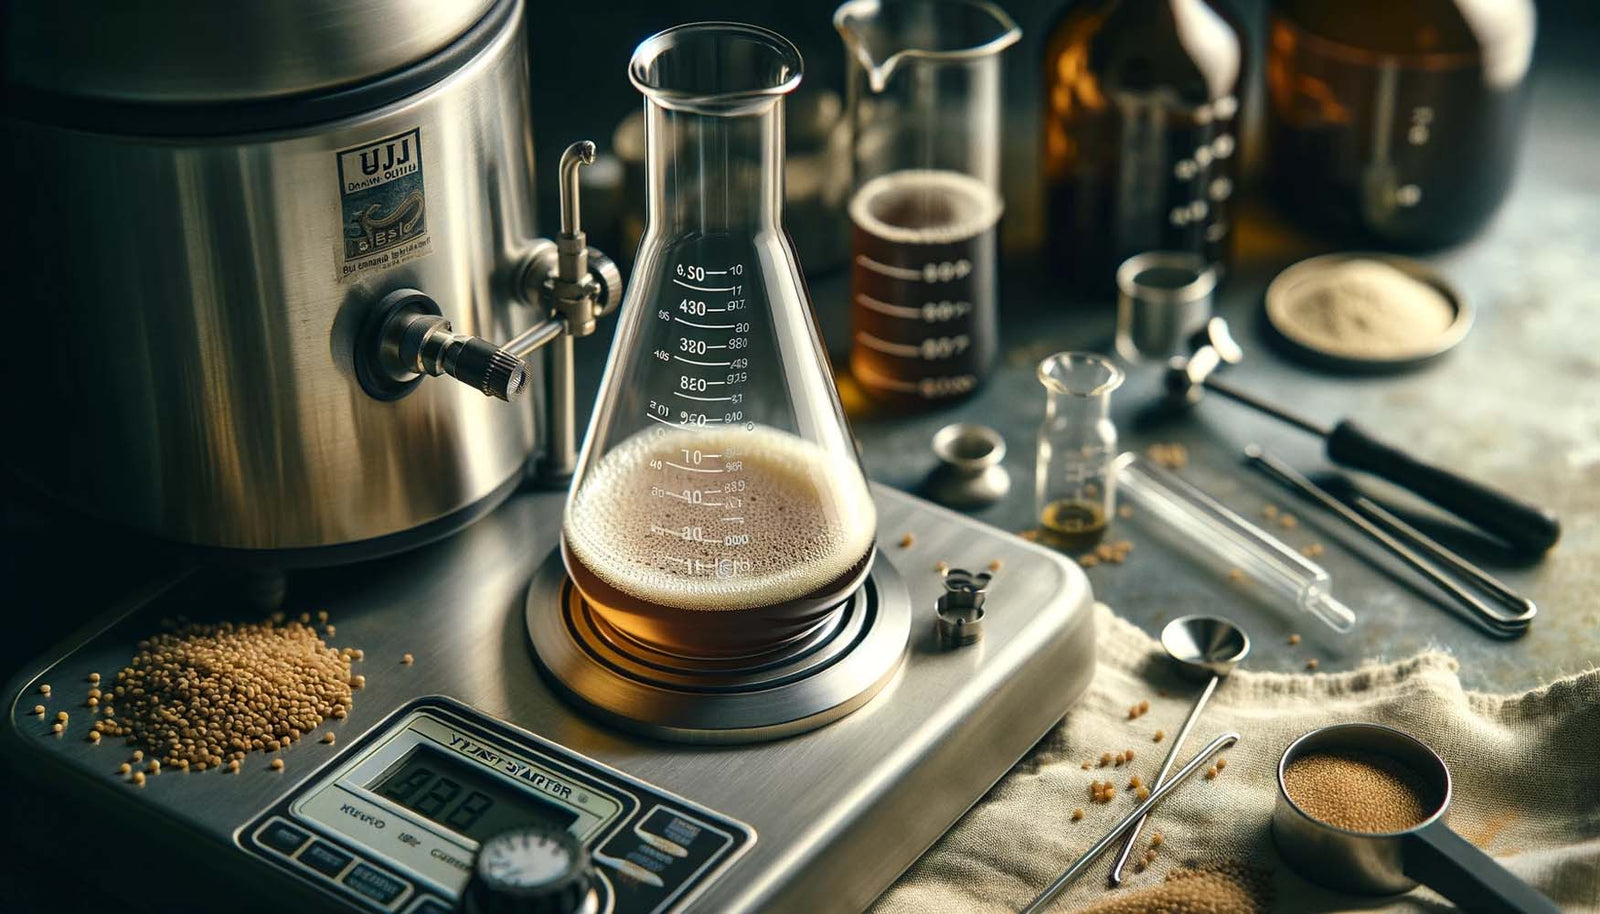
Gathering Your Supplies
Now that we understand the importance of a yeast starter, let's gather the supplies we'll need to get started.
Before we dive into the process of building a yeast starter, it's essential to have all the necessary equipment at hand. Here's a detailed list of what you'll need:
Essential Equipment for a Yeast Starter
To build a yeast starter, you will need the following equipment:
- A glass or plastic container with a lid, such as a flask or a growler
- A stirring device, like a stir plate or a sanitized spoon
- A sanitized airlock or a piece of sanitized aluminum foil
- A heat source, such as a hot plate or a stovetop
Let's take a closer look at each item on the list:
- Glass or Plastic Container: It's crucial to use a container that is suitable for holding your yeast starter. A glass flask or a plastic growler with a tight-fitting lid works best. These containers provide a safe and sterile environment for your yeast to thrive.
- Stirring Device: A stirring device is essential for keeping your yeast in motion and ensuring proper aeration. You can use a stir plate, which is a magnetic device that creates a rotating magnetic field, or a sanitized spoon for manual stirring.
- Sanitized Airlock or Aluminum Foil: To prevent any unwanted contaminants from entering your yeast starter, you'll need either a sanitized airlock or a piece of sanitized aluminum foil. Both options create a barrier that allows gases to escape while keeping harmful bacteria and wild yeast out.
- Heat Source: Lastly, you'll need a heat source to maintain the desired temperature for your yeast starter. A hot plate or a stovetop can provide the necessary heat, ensuring that your yeast remains active and healthy.
Choosing the Right Yeast
Choosing the right yeast strain for your beer is crucial. Consider the style of beer you are brewing and select a yeast strain that complements its flavor profile. There are countless yeast strains available on the market, each with its unique characteristics. Whether you're aiming for a crisp clean lager or a fruity hop-forward IPA, there's a yeast strain out there for you.
When selecting a yeast strain, it's important to consider factors such as fermentation temperature range, alcohol tolerance, and the desired flavor and aroma characteristics. Some yeast strains produce fruity esters, while others contribute to a more malty or spicy profile. Experimenting with different yeast strains can lead to exciting flavor variations in your beer.
Additionally, it's worth noting that some yeast strains are more suitable for certain beer styles. For example, a Belgian Witbier may benefit from the unique flavors and aromas provided by a Belgian yeast strain, while a German Hefeweizen relies on the characteristic banana and clove notes produced by specific yeast strains.
By carefully selecting the right yeast strain, you can enhance the overall quality and flavor of your beer. So take your time to research and choose wisely!
Preparing Your Yeast Starter
Now that we have our supplies ready, it's time to prepare our yeast starter!
Sanitizing Your Equipment
Before you begin, it is essential to ensure that all your equipment is properly sanitized. Yeast starters are susceptible to bacterial contamination, which can lead to off-flavors and spoiled beer. Clean and sanitize your glass or plastic container, stirring device, airlock (or aluminum foil), and any other equipment that will come into contact with the yeast starter.
Sanitizing your equipment is a crucial step in the yeast starter preparation process. Bacteria and wild yeast can easily find their way into your starter, causing unwanted flavors and potentially ruining your beer. By taking the time to thoroughly clean and sanitize your equipment, you are setting yourself up for success.
One effective method of sanitizing your equipment is by using a sanitizer solution. There are various sanitizers available on the market specifically designed for brewing purposes. These sanitizers work by killing any bacteria or wild yeast present on the surfaces of your equipment. Follow the instructions provided with your chosen sanitizer to ensure proper usage and effectiveness.
Mixing the Ingredients
Once your equipment is sanitized, it's time to mix the ingredients for your yeast starter. Start by boiling water and then adding malt extract to create a nutrient-rich environment for the yeast. Follow the manufacturer's instructions for the appropriate amount of malt extract to use. Stir the mixture until the extract is fully dissolved. Allow it to cool to room temperature before proceeding to the next step.
Malt extract plays a vital role in providing the necessary nutrients for yeast growth during the fermentation process. It contains essential sugars and other compounds that yeast need to thrive. By adding malt extract to your yeast starter, you are ensuring that the yeast will have a healthy environment to multiply and prepare for the main fermentation.
When stirring the mixture, make sure to use a clean and sanitized stirring device. Avoid using any metal utensils that may react with the ingredients or introduce contaminants. A plastic or silicone spoon is a good choice for stirring your yeast starter.
Cultivating Your Yeast Starter
After preparing the yeast starter, it's time to let nature do its magic and cultivate those yeast cells!
But what exactly happens during the fermentation process? Let's dive into the fascinating world of yeast biology. When you transfer the cooled wort and yeast into your sanitized glass or plastic container, you create the perfect environment for yeast to thrive. The sugars in the wort serve as food for the yeast, which they convert into alcohol and carbon dioxide through a process called fermentation. This is where the magic happens, and the flavors and aromas of your beer start to develop.
The Fermentation Process
Now that you have your yeast starter in the container, it's crucial to take some precautions to ensure a successful fermentation. Cover the container with a sanitized lid or use sanitized aluminum foil to prevent any unwanted contaminants from entering. Yeast are incredible organisms, but they can be sensitive to outside influences, so it's essential to create a clean and controlled environment for them.
Place your yeast starter in a warm and dark area, ideally around 70°F (21°C). Yeast are happiest at this temperature range, and it allows them to work their magic efficiently. As the yeast start fermenting, you may notice some bubbling or foaming within a few hours. This is a good sign that the yeast are active and doing their job.
Monitoring Your Yeast Starter
Over the next few days, it's essential to monitor the progress of your yeast starter. Check for signs of fermentation, such as bubbling, as this indicates that the yeast are happily converting sugars into alcohol. Give the container a gentle swirl to ensure the yeast is well-mixed, promoting a healthy and uniform fermentation process.
If you're using a stir plate, adjust the speed to maintain a gentle stirring motion. This continuous stirring helps keep the yeast in suspension, preventing them from settling at the bottom of the container. By keeping the yeast in suspension, you improve their overall health and vitality, leading to a more robust fermentation and better beer in the end.
Remember, patience is key during this stage. Yeast fermentation can take anywhere from a few days to a week or more, depending on various factors such as yeast strain, temperature, and the specific beer recipe. So sit back, relax, and let the yeast work their magic as they transform your wort into a delicious brew.
Using Your Yeast Starter in Brewing
Once your yeast starter is ready, it's time to use it to brew your beer!
But before we dive into the process of adding your yeast starter to your beer, let's take a moment to appreciate the magic that happens during fermentation. Fermentation is the heart and soul of brewing, where the yeast consumes the sugars in your wort and converts them into alcohol and carbon dioxide. It's a beautiful dance of microorganisms that transforms a simple mixture of water, malt, hops, and yeast into a delicious and refreshing beverage.
When to Add Your Yeast Starter
The optimal time to add your yeast starter to your beer depends on the specific recipe and fermentation schedule. In most cases, it is recommended to add the yeast starter when the fermentation has started slowing down or when it reaches its most active phase. This ensures that the yeast is healthy, active, and ready to tackle the remaining sugars in your beer.
However, it's important to note that every brewer has their own preferred method and timing for adding the yeast starter. Some prefer to pitch the starter at the beginning of fermentation to give the yeast a head start, while others like to wait until the krausen (foamy layer on top of the beer) starts to recede. Ultimately, the decision is yours to make based on your brewing style and desired outcome.
Tips for Successful Brewing with a Yeast Starter
Here are a few essential tips to ensure successful brewing with a yeast starter:
- Pitch the yeast starter when it is at its peak activity to maximize yeast health and vitality. This is usually when the starter is at its most foamy and bubbling vigorously. It's a sign that the yeast is in its prime and ready to work its magic in your beer.
- Aerate your wort before pitching the yeast starter to provide ample oxygen for the yeast to thrive. Oxygen is essential for yeast growth and reproduction, so make sure to give your wort a good shake or use an aeration stone to introduce oxygen before adding the yeast.
- Monitor the fermentation temperature to prevent any unwanted off-flavors or stressed yeast. Yeast is a delicate creature that thrives within a specific temperature range. Too hot, and it can produce off-flavors, while too cold, and it may go dormant. Keep a close eye on the temperature and make any necessary adjustments to create the ideal environment for your yeast.
- Keep detailed fermentation notes to track the performance of different yeast strains and refine your brewing process over time. Each yeast strain has its own unique characteristics and flavors it imparts on the beer. By taking notes and comparing the results, you can fine-tune your recipes and techniques to achieve the desired outcome.
By following these tips and mastering the art of building a yeast starter, you'll be well on your way to brewing exceptional beers that will impress your friends and family. Remember, practice makes perfect, so don't be afraid to experiment and refine your technique. Happy brewing!
And there you have it, the final step in the yeast starter journey. Now it's time to sit back, relax, and let the yeast work its magic. As the days go by, you'll witness the transformation of your wort into beer, with all its complex flavors and aromas. So raise a glass to the yeast, the unsung hero of brewing, and enjoy the fruits of your labor. Cheers!
Ready to elevate your home brewing experience with the highest quality equipment? Look no further than Bräu Supply, the pioneers of the all-in-one brew system, the Unibräu. Whether you're a novice or a seasoned brewer, our Unibräu, Unibräu Pro, and HERMS systems offer unparalleled efficiency and convenience, allowing you to craft exceptional beers in the comfort of your home. With our modular, electric-powered brew kettles and the innovative Unitank jacketed fermenters, you'll have everything you need for a seamless brewing process. Plus, our extensive selection of accessories ensures you can tailor your setup to your exact brewing requirements. Don't settle for less – check out our products today and join the Bräu Supply family of satisfied brewers. Happy brewing!
More Articles on Fermentation
Pros and cons of stainless conical Unitank fermenters for homebrewing
Mastering the cold side of brewing: a comprehensive guide
What is a fermenter: a comprehensive guide to understanding the process
Troubleshooting fermentation problems in brewing: a comprehensive guide
Unlocking the magic of cold side flavour infusion in brewing: techniques and troubleshooting
The art of lagering: a guide to perfecting the cold conditioning process
Subscribe
Sign up to get the latest on sales, new releases and more …