Our systems ship tarrif free

How to Make a Yeast Starter: A Step-by-Step Guide
January 16, 2024 9 min read
How to Make a Yeast Starter: A Step-by-Step Guide
If you're a baking or brewing enthusiast, you may have heard about the importance of a yeast starter for achieving exceptional results. A yeast starter is a small batch of yeast that is grown before being added to a larger batch of dough or wort. In this step-by-step guide, we will explore the process of making a yeast starter and its significance in the fermentation process.
Understanding the Importance of a Yeast Starter
Before delving into the details of making a yeast starter, it's crucial to understand the role yeast plays in baking and brewing. Yeast is a type of fungus that feeds on sugars and produces carbon dioxide gas and alcohol as byproducts. In baking, yeast is responsible for leavening the dough, creating the fluffy texture in bread and other baked goods. In brewing, yeast is essential for fermenting the sugars in the wort and converting them into alcohol.
The Role of Yeast in Baking and Brewing
In baking, yeast acts as a leavening agent by releasing carbon dioxide gas through the process of fermentation. This gas gets trapped in the dough, causing it to rise and create a light and airy texture. Additionally, yeast produces alcohol and flavor compounds during fermentation, enhancing the taste and aroma of baked goods.
When it comes to brewing, yeast plays a similar role. After the malted grains have been mashed and boiled to create the wort, yeast is added to initiate fermentation. During this process, the yeast consumes the sugars in the wort and produces alcohol and carbon dioxide as byproducts. The carbon dioxide is released into the air, while the alcohol remains in the liquid, giving beer its characteristic alcoholic content.
Furthermore, the type of yeast used in brewing can greatly influence the flavor profile of the final beer. Different yeast strains produce different flavors and aromas, ranging from fruity and estery to spicy and phenolic. This makes yeast selection a critical factor in creating unique and distinct brews.
Why Use a Yeast Starter?
A yeast starter serves two main purposes – to increase the quantity of active yeast cells and to ensure their vitality. By allowing the yeast to propagate in a smaller volume before pitching it into the main batch, you can ensure a healthy and vigorous fermentation process. This is especially crucial for high-gravity beers or when using older or less viable yeast strains.
When making a yeast starter, you provide the yeast with a nutrient-rich environment that promotes cell growth. This allows the yeast to multiply and reach a higher cell count than if you were to directly pitch it into the main batch. By giving the yeast a head start in a controlled environment, you allow it to adapt to the specific conditions of your recipe, such as temperature and gravity. This can result in improved fermentation efficiency and a more consistent flavor profile in your final product.
Additionally, a yeast starter can help determine the viability of the yeast. If the yeast fails to show signs of fermentation or exhibits off-flavors during the starter process, it may indicate that the yeast is not healthy or viable enough to be used for fermentation. This can save you from potential issues and disappointment in the final product.
In conclusion, understanding the importance of a yeast starter is crucial for both baking and brewing. By providing the yeast with a favorable environment to multiply and adapt, you can ensure a successful fermentation process and achieve the desired flavors and aromas in your finished product.
Gathering Your Supplies for a Yeast Starter
Now that we understand the importance of a yeast starter, let's gather the necessary supplies to begin the process. Making a yeast starter requires a few essential ingredients and specific equipment.
Essential Ingredients for a Yeast Starter
The primary ingredient for a yeast starter is, of course, yeast. Yeast is a single-celled fungus that plays a crucial role in fermentation, converting sugars into alcohol and carbon dioxide. There are various types of yeast available for brewing, each with its own unique characteristics and flavors. You can use liquid yeast cultures, which come in vials or pouches, or dry yeast, which is available in small packets.
In addition to yeast, you will need a source of fermentable sugars. This provides the food for the yeast to consume and multiply. Malt extract, which is derived from malted barley, is a popular choice among homebrewers. It comes in liquid or powdered form and provides a rich and complex flavor profile. Alternatively, you can use malted grains, such as barley, wheat, or rye, which need to be mashed and converted into fermentable sugars. If you're looking for a simpler option, readily fermentable sugars like table sugar or honey can also be used.
Lastly, you'll need water, preferably distilled or filtered, to create the ideal environment for yeast propagation. Water quality is essential in brewing, as chlorine and other impurities can negatively affect yeast health and fermentation. Using distilled or filtered water ensures a clean and consistent starting point for your yeast starter.
Necessary Equipment for Yeast Cultivation
Creating a yeast starter requires some basic equipment to ensure a successful fermentation process. Here are the essential tools you'll need:
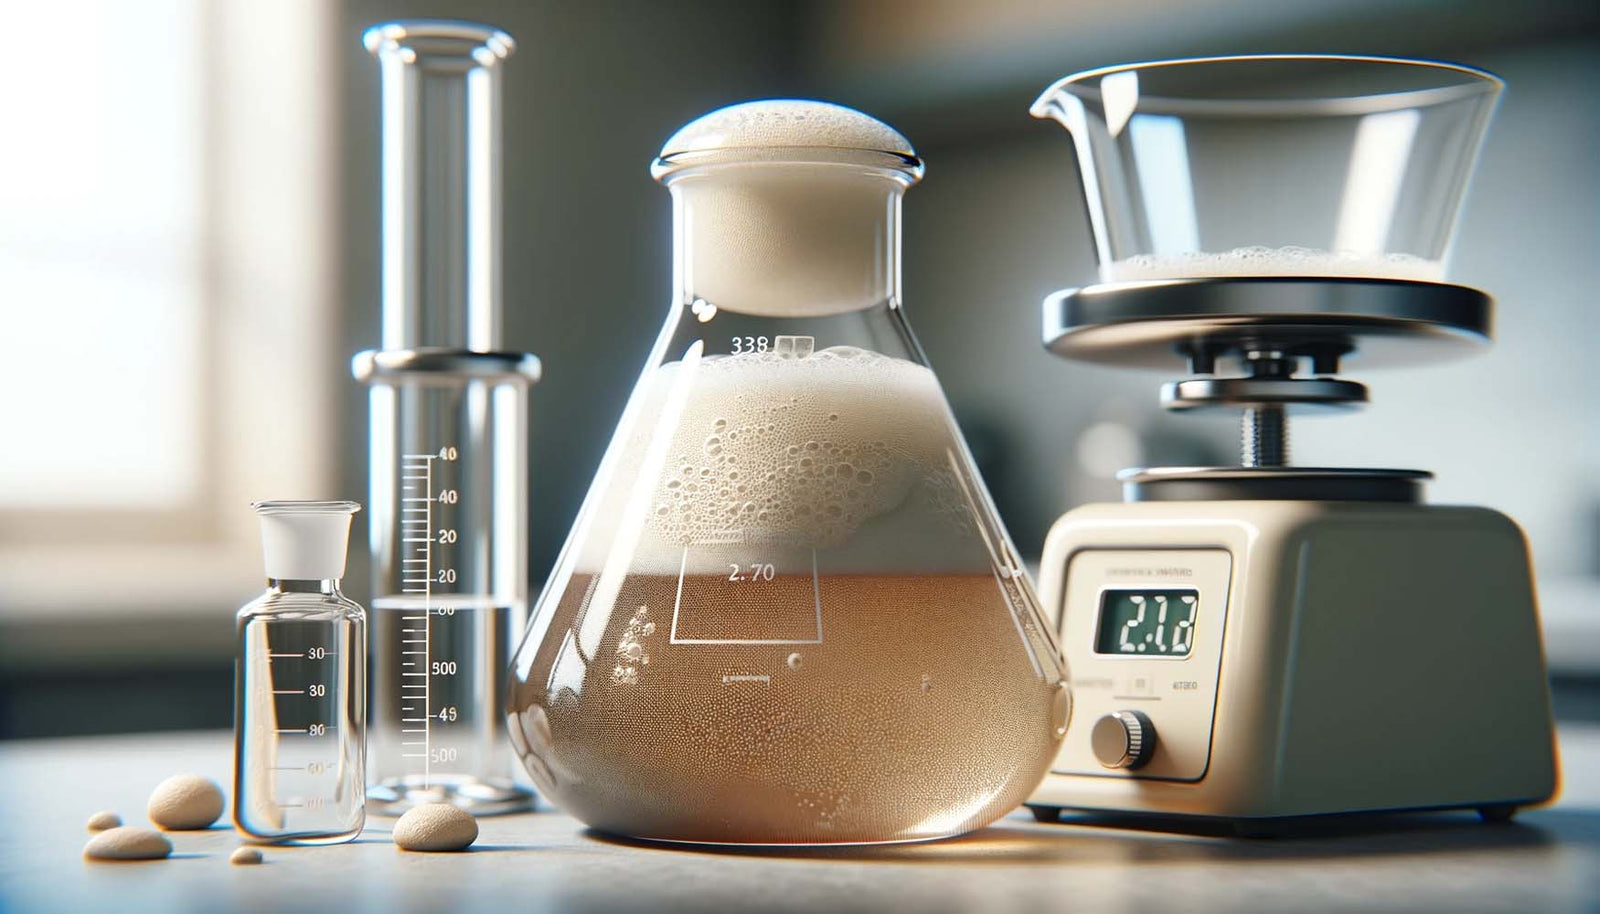
1. Container: You will need a container with a capacity of at least one liter to hold the yeast starter. This container should be made of a material that is suitable for fermentation, such as glass, food-grade plastic, or an Erlenmeyer flask. Glass containers are popular among homebrewers due to their durability and ease of sanitization.
2. Airlock or Aluminum Foil: To cover the container, you'll need an airlock or a sanitized piece of aluminum foil. An airlock is a small device that allows gas to escape during fermentation while preventing outside contaminants from entering the container. If you don't have an airlock, you can simply cover the container loosely with sanitized aluminum foil, ensuring that it is not airtight.
3. Stirring Utensil: A stirring utensil is necessary to mix the ingredients and ensure proper yeast propagation. A sanitized spoon or a stir bar can be used for this purpose. Make sure to sanitize the utensil thoroughly before introducing it to the yeast starter to avoid any potential contamination.
With these ingredients and equipment in hand, you are now ready to embark on the journey of creating a yeast starter. This crucial step will help ensure a healthy and vigorous fermentation, leading to delicious and well-rounded beer.
The Step-by-Step Process of Making a Yeast Starter
Now that we have our supplies ready, let's dive into the step-by-step process of making a yeast starter. Creating a yeast starter typically involves three main stages: preparing your ingredients, mixing and cultivating your yeast starter, and monitoring the fermentation process.
Preparing Your Ingredients
The first step in making a yeast starter is to gather your ingredients and ensure they are clean and sanitized. This includes thoroughly cleaning and sanitizing your container, airlock or aluminum foil, stirring utensil, and any other equipment that will come into contact with the yeast starter.
Once everything is sanitized, measure out the desired amount of fermentable sugars and dissolve them in the appropriate amount of water. Heat the water if necessary to aid sugar dissolution, then let the mixture cool down to room temperature before proceeding.
Mixing and Cultivating Your Yeast Starter
Once your sugar solution has cooled, it's time to add the yeast. Follow the instructions provided with your yeast strain to determine the appropriate amount to use. Gently sprinkle or pitch the yeast into the container containing the sugar solution and stir it gently to distribute the yeast evenly.
After mixing the yeast, cover the container with the sanitized airlock or aluminum foil. This allows carbon dioxide gas to escape while preventing airborne contaminants from entering. Place the container in a warm and dark location, ideally between 68-72°F (20-22°C), to encourage yeast growth.
Over the next few days, the yeast will begin to multiply and ferment the sugars, creating a visible layer of foam known as krausen. During this period, it's essential to maintain a stable temperature and avoid disturbing the yeast starter unnecessarily.
Monitoring the Fermentation Process
As the fermentation progresses, it's crucial to monitor the activity of the yeast starter. Depending on the yeast strain and environmental conditions, fermentation can take anywhere from a few days to a week or more.
During this time, observe the krausen formation, which indicates that the yeast is actively fermenting. You may also notice bubbles rising to the surface and a yeasty aroma. If you spot any signs of contamination, such as unusual odors or mold, it is recommended to discard the yeast starter and start anew.
Once the yeast starter has completed fermentation, it is now ready to be incorporated into your recipe or stored for future use. But before we delve into storage and usage, let's explore common issues that can arise during the yeast starter process and how to troubleshoot them.
Troubleshooting Common Issues with Yeast Starters
Despite your best efforts, issues can occasionally arise when making a yeast starter. Fortunately, most of these problems have simple solutions.
Identifying Problems with Your Yeast Starter
If you notice any of the following issues with your yeast starter, it's essential to identify the problem before proceeding:
- Lack of fermentation activity or slow fermentation
- Unusual odors or off-flavors
- Excessive foam or overflow
- Persistent contamination
Take the time to carefully analyze the symptoms and consider any potential causes. This will help you determine the appropriate course of action to fix the problem.
Solutions for Common Yeast Starter Problems
To address the most common issues with yeast starters, consider the following solutions:
- If fermentation activity is slow or nonexistent, ensure that the yeast is viable and within the proper temperature range. Check the expiration date and consider pitching additional yeast if necessary.
- If unusual odors or off-flavors are present, the yeast may be contaminated. Discard the starter and sanitize your equipment thoroughly before starting over.
- If excessive foam or overflow occurs, use a larger container for future starters or reduce the initial volume of the sugar solution.
- If you are experiencing persistent contamination, double-check your sanitization methods and consider using different yeast strains or obtaining yeast from a reliable source.
Storing and Using Your Yeast Starter
Once your yeast starter has completed fermentation, you have two options – incorporating it into your recipe immediately or storing it for future use.
Proper Storage Techniques for Yeast Starters
If you plan to use your yeast starter in the next few days, you can refrigerate it to slow down the yeast's activity. Before refrigeration, decant or skim off any excess liquid and transfer the remaining yeast into a sanitized container. Seal the container tightly to prevent contamination and store it in the refrigerator at a temperature between 35-40°F (2-4°C).
If you don't intend to use the yeast starter within a week, it's best to freeze it for long-term storage. To freeze the yeast starter, transfer it to a sanitized container or divide it into smaller portions. Make sure to leave enough headspace as the yeast may expand during freezing. Seal the container tightly and store it in the freezer at a temperature between 0-5°F (-18 to -15°C).
Incorporating Your Yeast Starter into Recipes
When you're ready to use your yeast starter, calculate the appropriate quantity to pitch into your recipe. The amount will vary depending on factors such as batch size and desired fermentation characteristics. Consult the instructions provided with your recipe or consult brewing or baking references for guidance on yeast pitching rates.
When incorporating the yeast starter, decant or remove any excess liquid before pitching the yeast into your dough or wort. Gently stir or swirl the container to loosen the yeast and pour it into your recipe. Be cautious not to introduce any contaminants during this process.
By using a yeast starter, you are giving yourself a head start towards achieving optimal fermentation and improved flavor in your baked goods or homebrews. The process might seem intricate, but with practice, it will become an indispensable component of your baking and brewing arsenal. So, gather your ingredients, sanitize your equipment, and embark on the journey of yeast cultivation and propagating flavors in your delicious creations!
Ready to elevate your home brewing experience with the right equipment? Look no further than Bräu Supply, the pioneers of the all-in-one brew system, the Unibräu. Whether you're a novice or a seasoned brewer, our Unibräu, Unibräu Pro, and HERMS systems are designed with the highest quality 304 stainless steel and electric power to streamline your brewing process. Our modular brew kettles and Unitank jacketed fermenters, along with a vast selection of accessories, ensure that you have everything you need for a successful brew day. Check out our products and discover how Bräu Supply can provide you with better value and the highest quality brewing equipment available.
MORE ARTICLES HOW TO BREW BEER
The ultimate guide to Kveik yeast: Unleashing it's fermentation potential
Revolutionizing home brewing: The simplified art of no sparge brewing
Exploring amber ales: A guide with a twist on the traditional recipe
Mastering cold crashing: Enhancing beer clarity and accelerating the aging process
What is the basic function of the fermenter?
What causes a fermenter to heat up?
The art of lagering: A guide to perfecting the cold conditioning process
Troubleshooting fermentation problems in brewing: A comprehensive guide
Subscribe
Sign up to get the latest on sales, new releases and more …